
Being a mom of two, I am finding it harder and harder to find time to sew. So when I can finish a project during my daughter's nap, while also tending to my 3 year old ('Mama, I need to go potty...Mama, can I have a snack?' You get the picture.) it is AWESOME. This is one of those projects!!
The Dino Hooded Bath Towel.
Quick. Easy. Super fun.
I first found this tutorial from Infarrantly Creative, years ago. It is super easy and only takes about 30 minutes. When I made Bobby one, I added some dino spikes to the hood. He loved it!! He 'ROARED' all the way from the bathroom to his room! Lily was growing out of her store bought hooded towels, so I made her one also. A girly one. She looks so cute all bundled up!
I decided to let y'all in on how to make one of your own!
The great thing about these towels is that they are large, so your kiddos can use them for a long time!


ROAR!!!
Do you want to make your own Dino Hooded Bath Towel?? Keep reading to find out how!
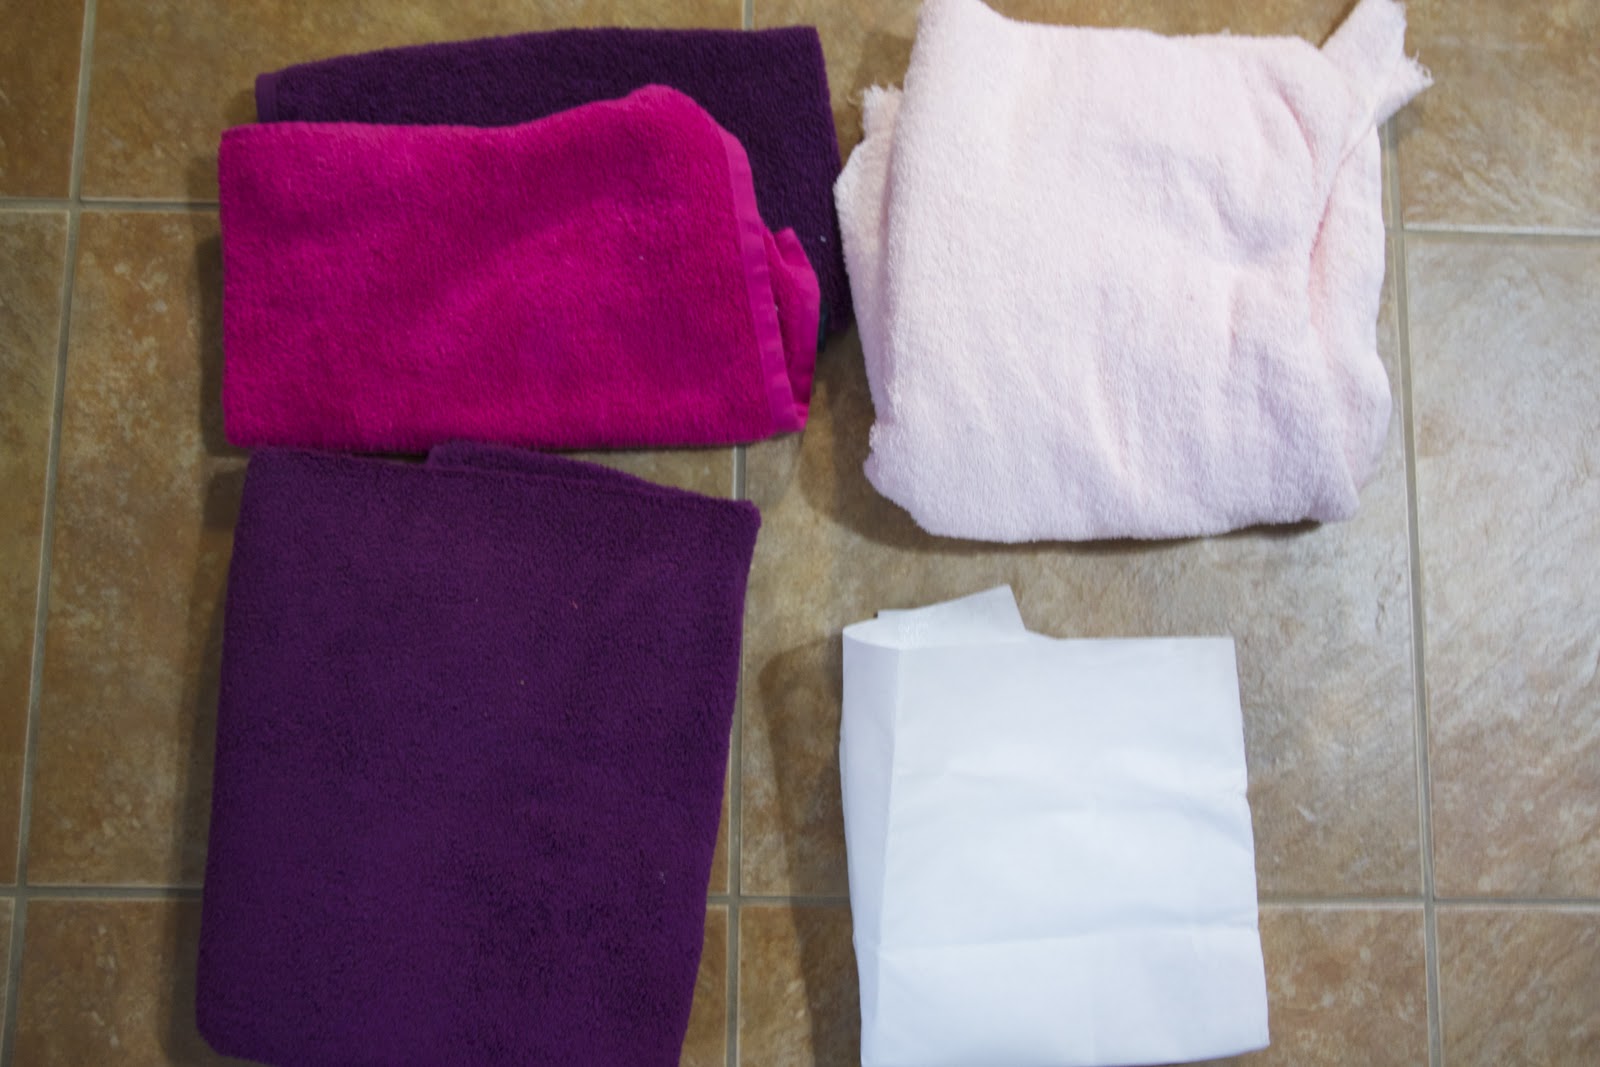
Supplies:
**You might want to change your needle for heavyweight fabrics, since you will be sewing through multiple thick layers.
1 full size bath towel
1 hand towel in the same color as the bath towel
1 hand towel in coordinating color for the spikes
Heavyweight iron on interfacing (you can find this at Hobby Lobby or Jo Ann's)
(The picture shows a light pink terry cloth, but I ended up not using that...so ignore it!! )
Iron, straight pins, marking pen, ruler or measuring tape.

Take the matching hand towel and measure 10" from the bottom. (Long ways, if that makes sense) Draw a line all the way across to mark where you will cut. Cut along the line. This will be your hood.

Fold the hood in half, matching raw edge to raw edge, finished edge to finished edge. Cut along the fold. Set aside.

Now take your coordinating hand towel and cut the spikes. For my daughter's towel I made half circles, for my son I made triangle spikes. You can get creative with this! There are so many different things you could do. Wide triangles or narrow...semi circles or longer circles...whatever you decide, I'm sure it will be great!
Cut 6 pieces.

Cut 6 pieces of interfacing. Cut them slightly smaller than your terry cloth. Follow the directions and iron them onto your spikes.
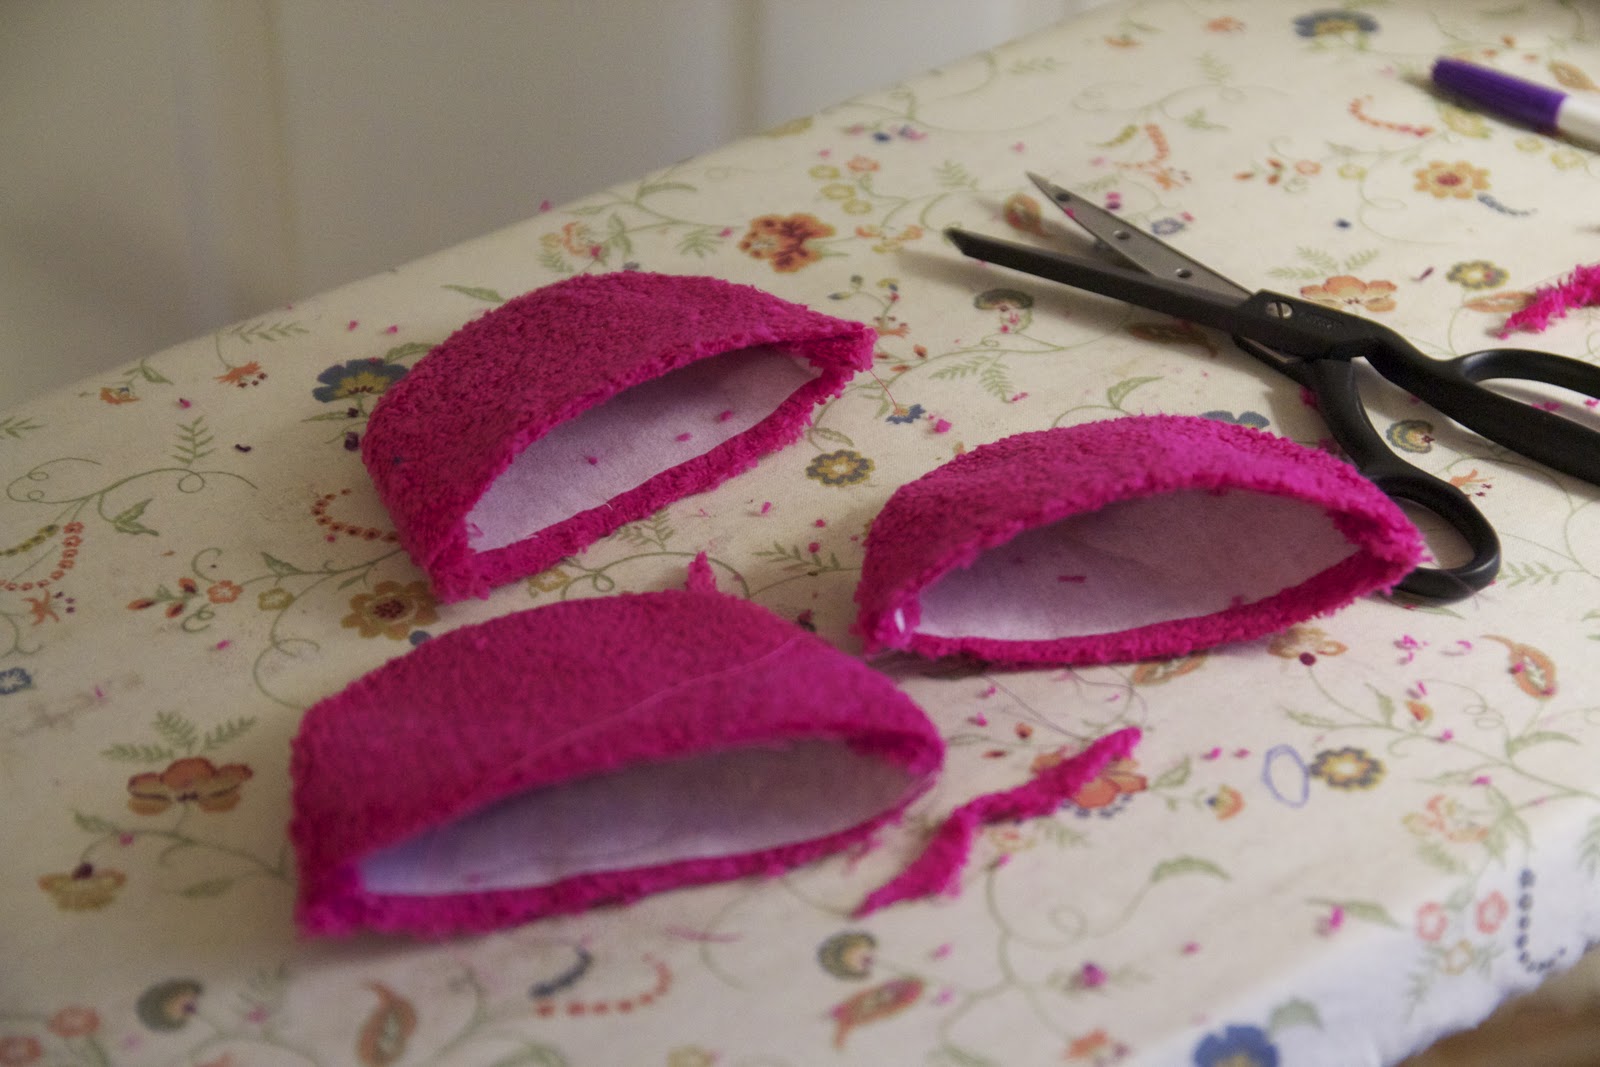
Then, pair up your spikes and pin them together, right sides facing.
(You should be able to see your interfacing.) Sew along the curve with a
1/4" seam allowance, leaving the bottom open.
Turn right side out and press with your iron.

After your spikes are nice and pressed, sew along the curved edge, giving it a nice finished look.

Now place the spikes onto the right side of one of the hood halves. Match up the raw edges.

Place the other half of the hood on top, sandwiching the spikes in between both pieces. again matching up all the raw edges. Pin all 3 layers together.

Sew along the 2 raw edges, making sure to get all three layers. Follow the curve of the spikes...yours should look similar to the picture above. Make sure to back stitch at each end.

Next, cut the corner making sure not to cut where you sewed. I ran an extra zig zag stitch all along the edge to prevent fraying. If you have a serger, you could serge this edge as well.

Flip it right side out! You now have your hood! Set aside.

Attach hood to the bath towel:
Take your bath towel and fold it in half, matching the shorter edges. Iron on the fold to make a crease. Open the towel and measure 4" on each side of the crease. Mark with a pin or marking pen.
I don't have a picture of this, but fold each mark towards the crease and pin in place. Sew across making sure you catch all three layers. You now have a pleat down the center of the towel.

Take your hood and line up the bottom part of the hood with the towel, right sides together. Match the center of the hood (where the spikes are) with the center crease of the towel. Pin in place. Sew all along this edge with a 1/4" seam allowance.
Take this part slow. Since you are going through so many layers, it is pretty thick, especially when you get close to the spikes. Make sure to back stitch at each end.

When you are done, this is what your towel should look like. Make sure to remove all your pins!

That's it! Now go give your kids a bath! They will be so excited to use their new Dino Towels!!

My little cutie. Who says dinosaurs are just for boys??
This is adorable! I love the colors and the photography is great- what camera do you use? A special lens?
ReplyDeleteThank you so much! I use a Canon 60-D. The lens is a Sigma 30mm, 1.4. I love taking pictures of my kids!
Delete