Showing posts with label baby gifts. Show all posts

Friday, March 9, 2012

Featured: Simple Girls Headband Tutorial

I realize I have been MIA for awhile, but I have good excuses, honest! I have been hard at work on some tutorials for Ann Kelle. I posted about my first one last week, and yesterday my second one was featured on her blog!

This headband was inspired by my 10 minute headband. I altered it a bit for my daughter. She looks so adorable in these!

Perfect for the summer. 


I have more excuses why I haven't been around, but I'll share those with you later. :)


Sunday, January 15, 2012

Tutorial: Dino Hooded Bath Towel

 Being a mom of two, I am finding it harder and harder to find time to sew. So when I can finish a project during my daughter's nap, while also tending to my 3 year old ('Mama, I need to go potty...Mama, can I have a snack?' You get the picture.) it is AWESOME. This is one of those projects!!

The Dino Hooded Bath Towel.

Quick. Easy. Super fun.


I first found this tutorial from Infarrantly Creative, years ago. It is super easy and only takes about 30 minutes. When I made Bobby one, I added some dino spikes to the hood. He loved it!! He 'ROARED' all the way from the bathroom to his room! Lily was growing out of her store bought hooded towels, so I made her one also. A girly one. She looks so cute all bundled up!

I decided to let y'all in on how to make one of your own! 

The great thing about these towels is that they are large, so your kiddos can use them for a long time!


 ROAR!!!

Do you want to make your own Dino Hooded Bath Towel?? Keep reading to find out how! 


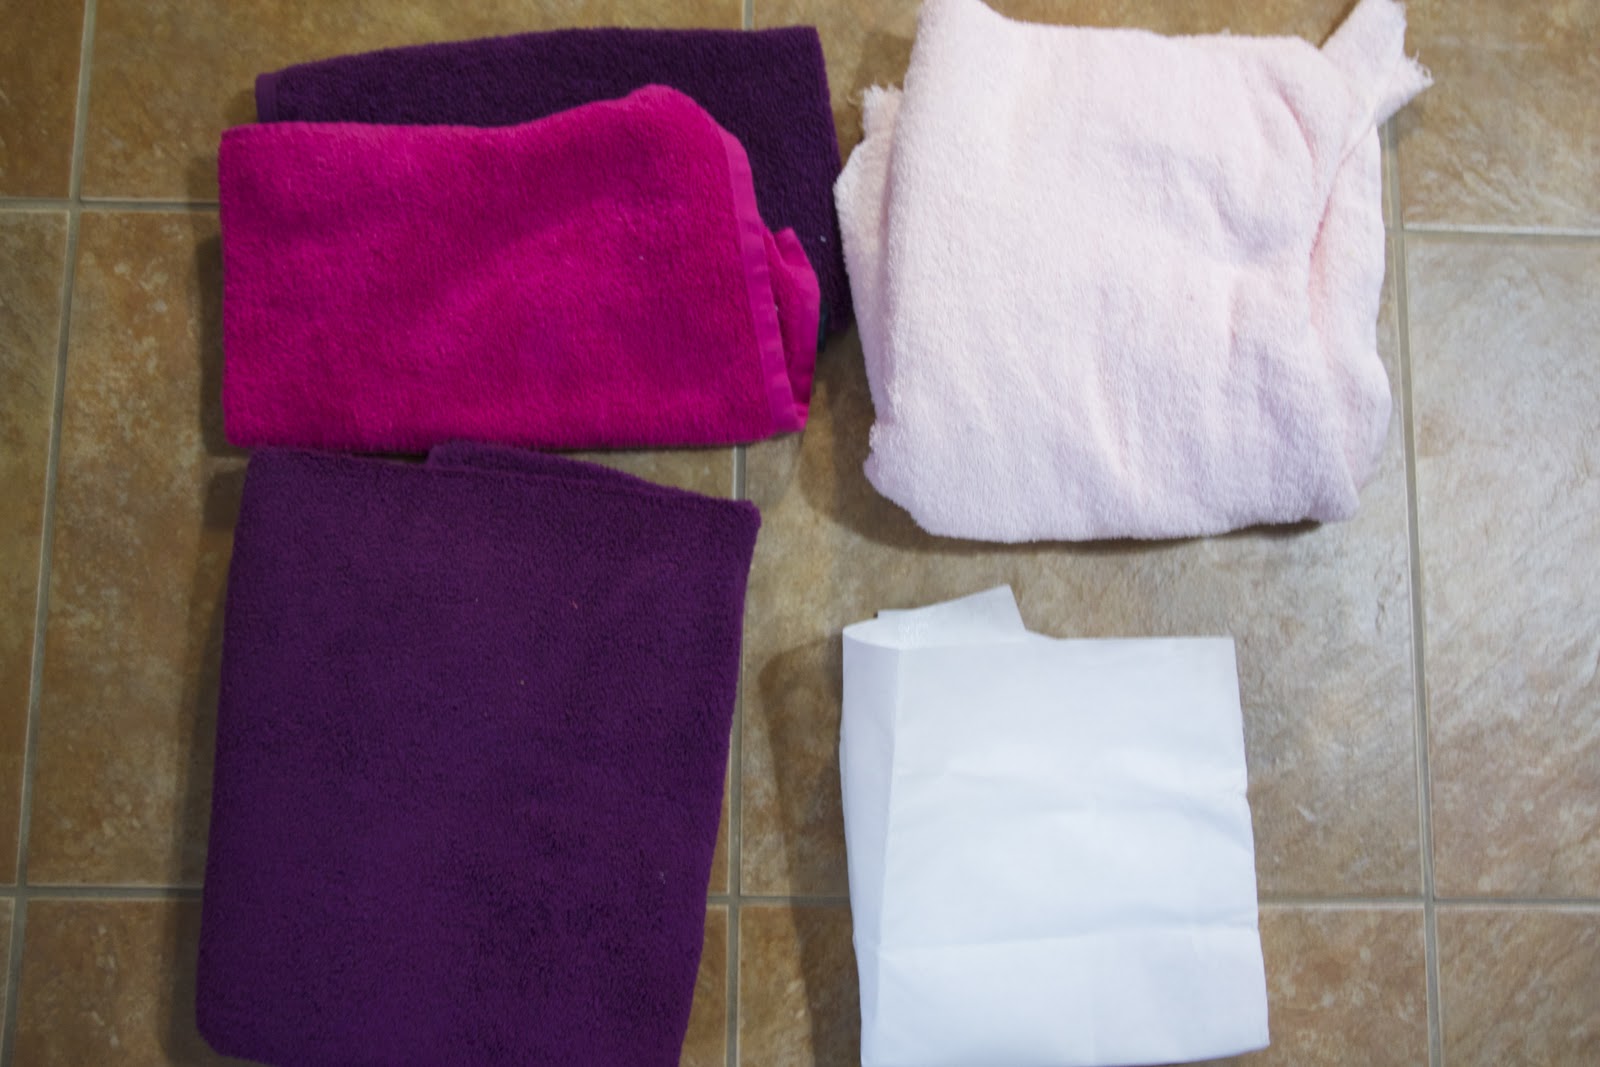
Supplies:
**You might want to change your needle for heavyweight fabrics, since you will be sewing through multiple thick layers.
1 full size bath towel
1 hand towel in the same color as the bath towel
1 hand towel in coordinating color for the spikes
Heavyweight iron on interfacing (you can find this at Hobby Lobby or Jo Ann's)
(The picture shows a light pink terry cloth, but I ended up not using that...so ignore it!! )

Iron, straight pins, marking pen, ruler or measuring tape.

Make the Hood:
Take the matching hand towel and measure 10" from the bottom. (Long ways, if that makes sense) Draw a line all the way across to mark where you will cut. Cut along the line. This will be your hood.


Fold the hood in half, matching raw edge to raw edge, finished edge to finished edge. Cut along the fold. Set aside.


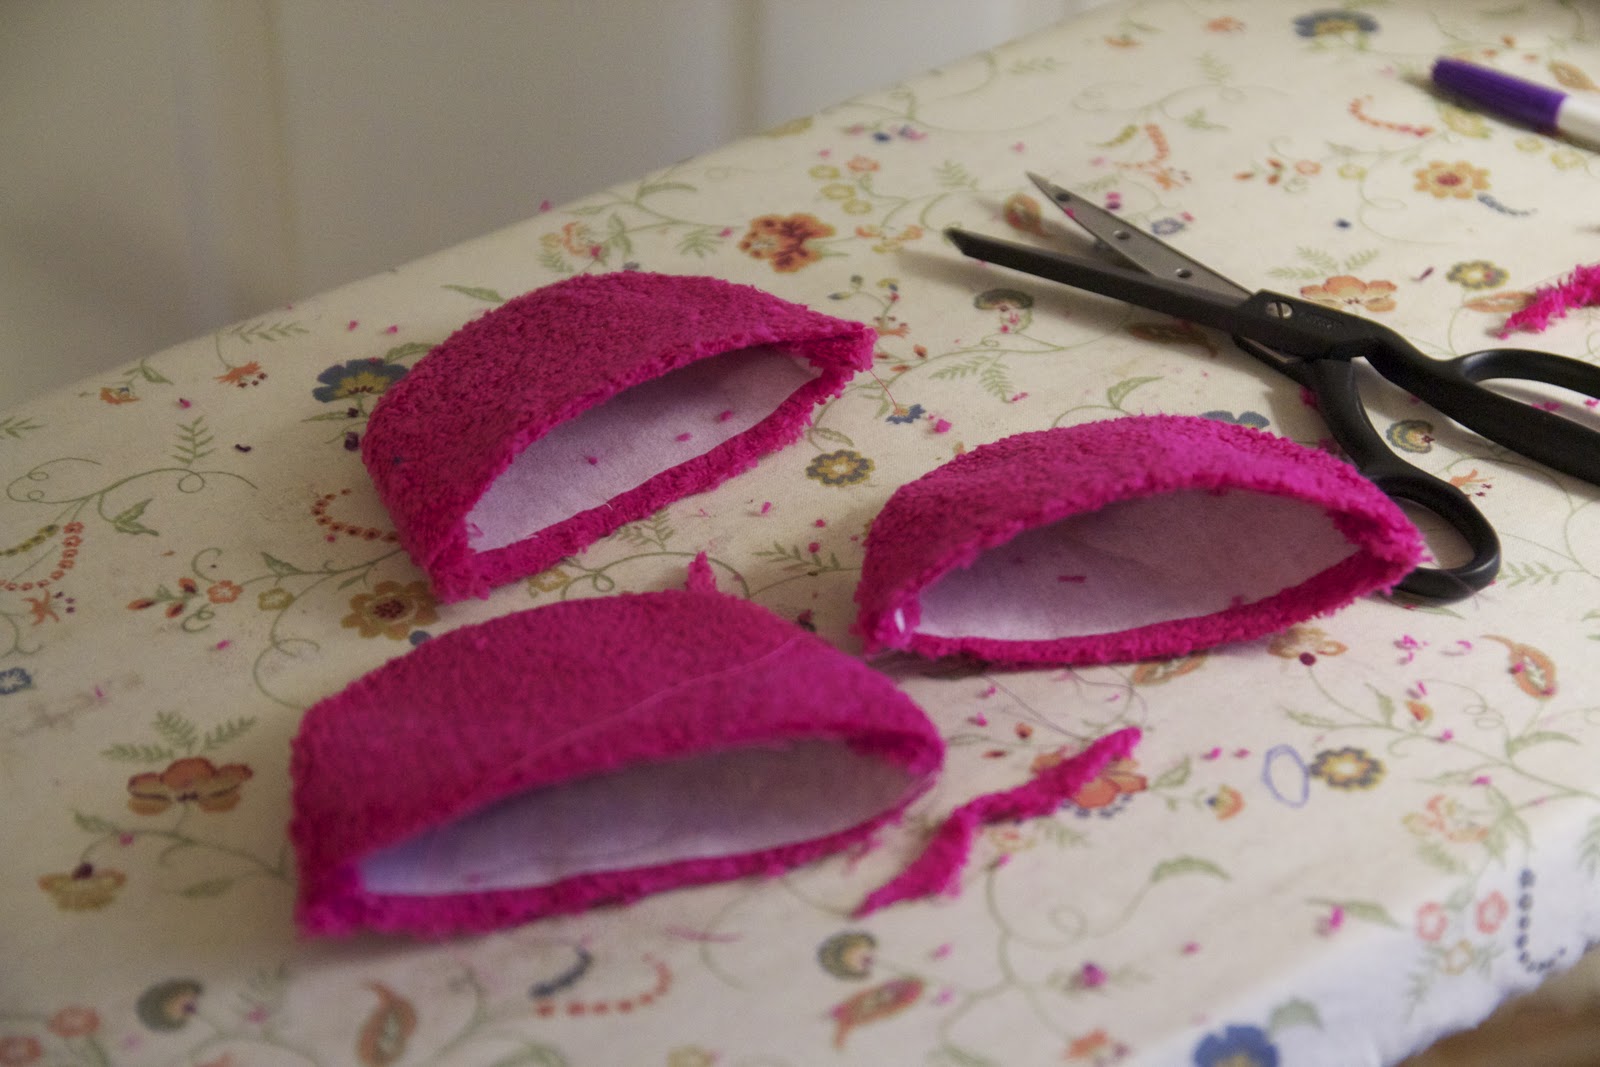
Now take your coordinating hand towel and cut the spikes. For my daughter's towel I made half circles, for my son I made triangle spikes. You can get creative with this! There are so many different things you could do. Wide triangles or narrow...semi circles or longer circles...whatever you decide, I'm sure it will be great!
Cut 6 pieces.


Cut 6 pieces of interfacing. Cut them slightly smaller than your terry cloth. Follow the directions and iron them onto your spikes. 


Then, pair up your spikes and pin them together, right sides facing. (You should be able to see your interfacing.) Sew along the curve with a 1/4" seam allowance, leaving the bottom open. 
Turn right side out and press with your iron.


After your spikes are nice and pressed, sew along the curved edge, giving it a nice finished look.


Now place the spikes onto the right side of one of the hood halves. Match up the raw edges. 


Place the other half of the hood on top, sandwiching the spikes in between both pieces. again matching up all the raw edges. Pin all 3 layers together. 


Sew along the 2 raw edges, making sure to get all three layers. Follow the curve of the spikes...yours should look similar to the picture above. Make sure to back stitch at each end.


Next, cut the corner making sure not to cut where you sewed. I ran an extra zig zag stitch all along the edge to prevent fraying. If you have a serger, you could serge this edge as well. 


Flip it right side out! You now have your hood! Set aside.


Attach hood to the bath towel:
Take your bath towel and fold it in half, matching the shorter edges. Iron on the fold to make a crease. Open the towel and measure 4" on each side of the crease. Mark with a pin or marking pen. 
I don't have a picture of this, but fold each mark towards the crease and pin in place. Sew across making sure you catch all three layers.  You now have a pleat down the center of the towel.


Take your hood and line up the bottom part of the hood with the towel, right sides together. Match the center of the hood (where the spikes are) with the center crease of the towel. Pin in place. Sew all along this edge with a 1/4" seam allowance. 
Take this part slow. Since you are going through so many layers, it is pretty thick, especially when you get close to the spikes. Make sure to back stitch at each end. 


When you are done, this is what your towel should look like. Make sure to remove all your pins!


That's it! Now go give your kids a bath! They will be so excited to use their new Dino Towels!!

My little cutie. Who says dinosaurs are just for boys??

Tuesday, June 21, 2011

Shop Update

I finally had some time to sew up some new goodies for the shop! I hope you'll stop by and check it out. I have some new hanging kitchen towels, baby bibs and coffee cozies! My shop is a great place to find handmade gifts for you or your friends! Here are a few of my favorites:


Monday, May 2, 2011

Pretty Hair Bow Holder

Lily has a lot of hair. So naturally, she has tons of hair bows! I needed something to do with them that would make finding them easier. I found this tutorial and loved it. I loved the look of the polka dots, so I found a yellow and white dot scrap of fabric on Etsy that was the perfect size for my frame. Hobby Lobby is a great place to find large frames for projects like this, because there isn't any glass in them to worry about. Plus, the frames are usually 50% off at least twice a month! Score!

I think it turned out really nice and it looks great in Lily' room. I think it would make such a cute gift!!


Finished!
I plan on hanging it above Lily's dresser, but for now, I just leaned it against the wall.

This is why Lily must wear hair bows! Poor girl, she can't see!!

There. That's better!

Thursday, March 31, 2011

Tutorial: Halter Ruffle Sunsuit


This idea came to me during a 3am feeding a couple weeks ago...you know...one of those times when you are half asleep/half awake and your mind starts to wonder...yeah, one of those times. I've started to get my best ideas during these early morning feedings! Ha!

I am very happy with the outcome, and Lily will be stylin' this Summer!


Ok, now for the tutorial:
**Please note: This is my first time making clothing, and while I am sure there are more efficient and better ways to do this, this is what worked for me. Feel free to let me know if anything is confusing or if you think I left something out.

Gather your materials:
Scissors,
seam ripper (a must!),
paper (for the pattern pieces),
fabric (you can use all one pattern or mix it up with 2 or 3),
matching thread,
braided elastic (1/8" and 1/2"),
safety pin,
velcro (1/2" wide),
1 button,
fabric marker,
onesie

Make your pattern pieces:

Trace an existing onesie on a large piece of paper. This should give you an approxamate shape for the 2 main panels. Make sure you measure your little one to make sure you are making the pieces big enough. I added 4 inches to the measurement I took on Li
ly, because I wanted it to fit kind of puffy.
Lily's chest measured about 18" around, so 18"+ 4"= 22". I cut each pattern piece about 11" wide, this included my seam allowance.* I measured from her armpits down to her crotch/diaper area and added 1" to the top (for the elastic casing) and 1/2" to the bottom for the seam. Make sense?

I used a large lid to draw the shape of the leg openings.

For the back panel, I cut it similar to what I saw on the onesie.

After you cut your 2 main panels, cut 1- 3" x 17" piece* for the ruffle and 1- 3" x 40" piece* for the halter strap and casing for the leg openings, as well as 3" velcro*, 17" of the 1/2"elastic*, and 2- 11"pieces of 1/8" elastic*.
*These measurements are what I used for my daughter, you probably will be making a different size, so adjust the measurements accordingly

Ruffle:
Fold over one long edge 1/4" and press, fold over again 1/4" and press again. On the other long edge, fold over 1/4" and press. Stitch along the double folded edge.

Set your machine on the widest stitch possible, and sew a basting stitch on the long edge that was only folded one time. Do not back stitch at either end. Then pull on one of the threads. This will start to bunch up your fabric, which will create a ruffle. Keep p
ulling/bunching until you are satisfied with your ruffle.
Easy, peasy!!

Measure about 2" from the top of the front panel, and mark with marking pen.

Pin and sew your ruffle 2" from the top of the main panel. (Make sure to reset your machine from the wide stitch back to the smaller stitch) You can then use your seam ripper to remove the basting stitch you used to make the ruffle.

Main Panels:
I don't have a picture of this, but pin together the 2 panels right sides facing along one side. Sew together using a 1/2" seam allowance, cut with pinking shears and press seam open. You could also serge or use a zig zag stitch if you don't have pinking shears.

Fold over the top edge 1/4" and press. Then fold over again about 3/4" and press again. Edge stitch along the bottom edge. Take your 1/2" elastic, attach one end to the safety pin and thread the elastic through the casing, making sure not to pull it all the way through. Sew the elastic to each end (a few times, for added durability) with a
1/4" seam allowance.

Your main panel should now look like this:


Fold so right sides are facing, and stitch a 1/2" seam down the side. Trim your seam allowance with your pinking shears and press open. Flip right side out.

Almost done!!

Halter strap and leg casing:

For the next step, you are basically making bias tape. Fold your fabric in half (long ways) and press. Open and fold each long edge toward the center crease (wrong sides together) and press again. Finally, fold in half one more time and press.

Pin the casing along each leg opening, making sure to sandwich the fabric from the main panel in between the casing pieces. Sew closely along the edge(the opened edge, not the folded edge, if that makes sense).


For the halter strap, I measured Lily to make sure it would be long enough, and cut 14". After folding in one end and sewing the strap shut along the open edge, make your button hole. I made 2 button holes so the outfit could grow with her a bit. This is up to you. If making button holes scares you, don't worry! You can use velcro if you want. But don't be scared! If your machine is capable of making button holes, take your manual and a scrap piece of fabric and practice, they are really pretty easy. :)


Now sew the end of the strap with the raw edge about 2" from the side seam on the front panel. I sewed mine right under the elastic on the inside, so it is hidden. Take your button and sew it (also on the inside) about 2" from the other side seam on the inside of the panel, right under the elastic also.


Elastic leg openings and velcro:

Using your safety pin again, thread the 1/8" elastic through the casing of each leg opening, sewing the elastic at each end of the casing (make sure to sew over the elastic a few times, for durability).

Fold over each unfinished edge of the front and back panel about 1/2". Place the velcro over the folded edges and sew. Sew the velcro for the top panel onto the wrong side of the fabric, and the velcro for the bottom panel onto the right side of the fabric. When the sunsuit is facing down, both velcro pieces should be facing you.


Now step back, and enjoy your finished product!!

I hope this made sense to you. I know this tutorial is long, and if you are reading this, than I thank you for reading the whole thing! If I over explained things, it was because I tried to make it easy even if you know very little about sewing. I would love to know if you tried to make this, and if you enjoyed my tutorial!
Related Posts Plugin for WordPress, Blogger...