Showing posts with label for the boys. Show all posts

Friday, March 23, 2012

Pinterest Made Me Do It: Dress-up Closet

Hey! I'm back with another fun and easy project inspired by Pinterest. There are so many fun things and ideas that I want to do, but there just isn't enough time! My son is really into dress up. Super hero dress up, of course! He has also had a thing for hats ever since he was little (he's a big boy now, ya know!) so he has quite the collection. 

There are a couple of dress-up closets/cabinets floating around Pinterest, which I think are just genius. I really wanted to make Bobby (and Lily) one. I remembered that we had this cabinet. It was sitting in storage for almost 2 years, so when we finally got it out, it clicked. 

Dress-up closet!


This is seriously the easiest project to do. I took out the adjustable shelf and added a tension rod for hanging the growing collection of costumes. I bought some hooks that stick on (I'm telling you...easy) and added them to the inside of the doors to use for hanging masks, necklaces...you name it. 

I also added 2 hooks on one side to hang Bobby's multiple capes. Which, if you need a fun cape tutorial, check out my Reversible Super Hero Cape tutorial


I find that the flea market is a great place to get cheap costumes. Especially around Halloween. I got the Spiderman, Bat Girl, Captain America, and Super Man Cape all at the flea market! For around $8 total. Bobby doesn't care if they are too big for him, he'll grow into them and it gives the costume longevity. He keeps telling me all the other super hero costumes he still needs to complete his collection. I guess it's back to the flea market for me! Lily already has a couple costumes as well. I know she will love this cabinet just as much as Bobby when she gets a little older.


I didn't take a picture of this, but I put a full length mirror on the other side of the cabinet as well. The drawers are perfect for all the hats, masks, swords, fairy wands...

My husband kindly spray painted the knobs for me to add a splash of color for fun. 

I really love how it turned out! We will get years and years of fun play time out of this dress-up closet. I'm so glad I found this idea on Pinterest! 


Bobby is too...

Wednesday, February 1, 2012

Oh Baby!


This past weekend, I traveled to the Houston area to help throw a baby shower for my twin sister, Casey. Casey is a wife, mom, designer and party planner extraordinaire. She has a great eye for anything.  I think Casey should be a party planner for her next career! She threw me two amazing baby showers. (Which you can check out here and here.)

Since she is such a great party planner, we knew we had to come up with something good! Her shower was full of bow ties, mustaches, and stripes! We also threw in a photo booth with mustache props for added fun. Very Casey... She loved it and had a great time!

Casey and her family are moving to Scotland very soon for my brother-in-law's job. They will be there for 4 years! I don't know what I'll do without my daily phone calls or multiple texts throughout the day. Thank goodness we live in a world with internet and Skype!  I will miss her so much, but I know this will be a fun adventure for her and her family! And you better believe we will be going for a visit! She will be blogging about it all, so stay tuned!


I made some fun bibs and onesies to go along with the theme. 


 Isn't she cute?
 (thank goodness we share maternity clothes...I will inherit this dress some day!)


Sunday, January 15, 2012

Tutorial: Dino Hooded Bath Towel

 Being a mom of two, I am finding it harder and harder to find time to sew. So when I can finish a project during my daughter's nap, while also tending to my 3 year old ('Mama, I need to go potty...Mama, can I have a snack?' You get the picture.) it is AWESOME. This is one of those projects!!

The Dino Hooded Bath Towel.

Quick. Easy. Super fun.


I first found this tutorial from Infarrantly Creative, years ago. It is super easy and only takes about 30 minutes. When I made Bobby one, I added some dino spikes to the hood. He loved it!! He 'ROARED' all the way from the bathroom to his room! Lily was growing out of her store bought hooded towels, so I made her one also. A girly one. She looks so cute all bundled up!

I decided to let y'all in on how to make one of your own! 

The great thing about these towels is that they are large, so your kiddos can use them for a long time!


 ROAR!!!

Do you want to make your own Dino Hooded Bath Towel?? Keep reading to find out how! 


Supplies:
**You might want to change your needle for heavyweight fabrics, since you will be sewing through multiple thick layers.
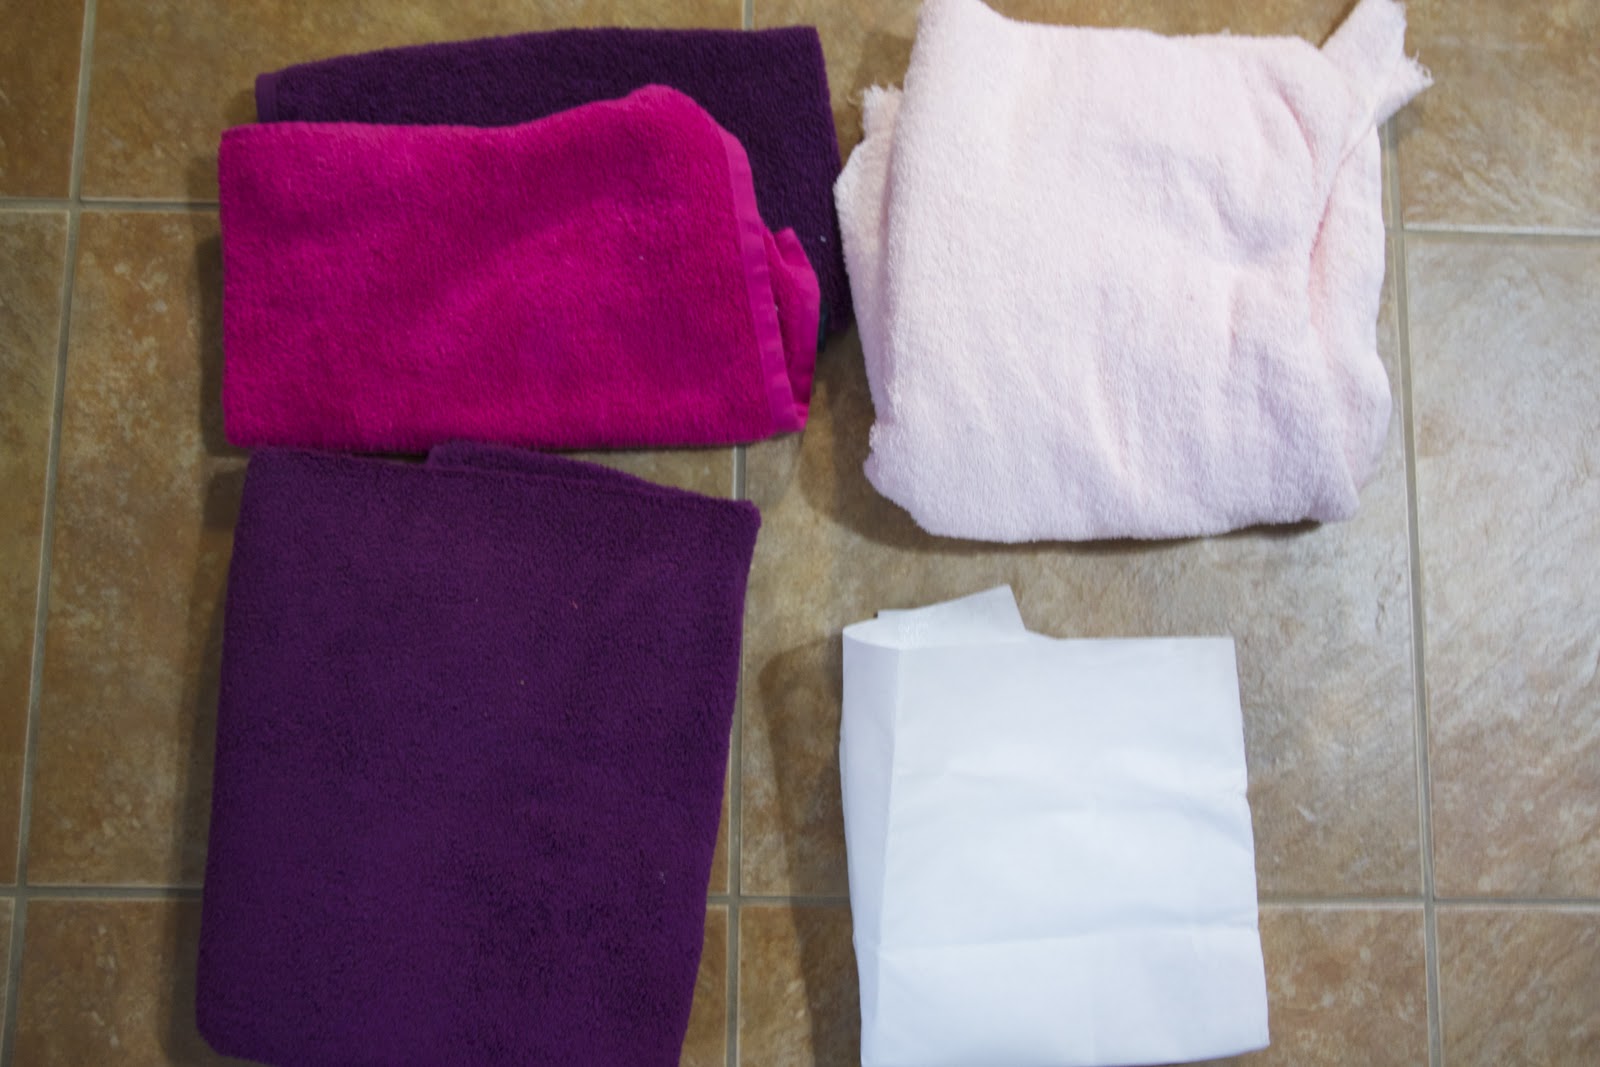
1 full size bath towel
1 hand towel in the same color as the bath towel
1 hand towel in coordinating color for the spikes
Heavyweight iron on interfacing (you can find this at Hobby Lobby or Jo Ann's)
(The picture shows a light pink terry cloth, but I ended up not using that...so ignore it!! )

Iron, straight pins, marking pen, ruler or measuring tape.

Make the Hood:
Take the matching hand towel and measure 10" from the bottom. (Long ways, if that makes sense) Draw a line all the way across to mark where you will cut. Cut along the line. This will be your hood.


Fold the hood in half, matching raw edge to raw edge, finished edge to finished edge. Cut along the fold. Set aside.


Now take your coordinating hand towel and cut the spikes. For my daughter's towel I made half circles, for my son I made triangle spikes. You can get creative with this! There are so many different things you could do. Wide triangles or narrow...semi circles or longer circles...whatever you decide, I'm sure it will be great!
Cut 6 pieces.


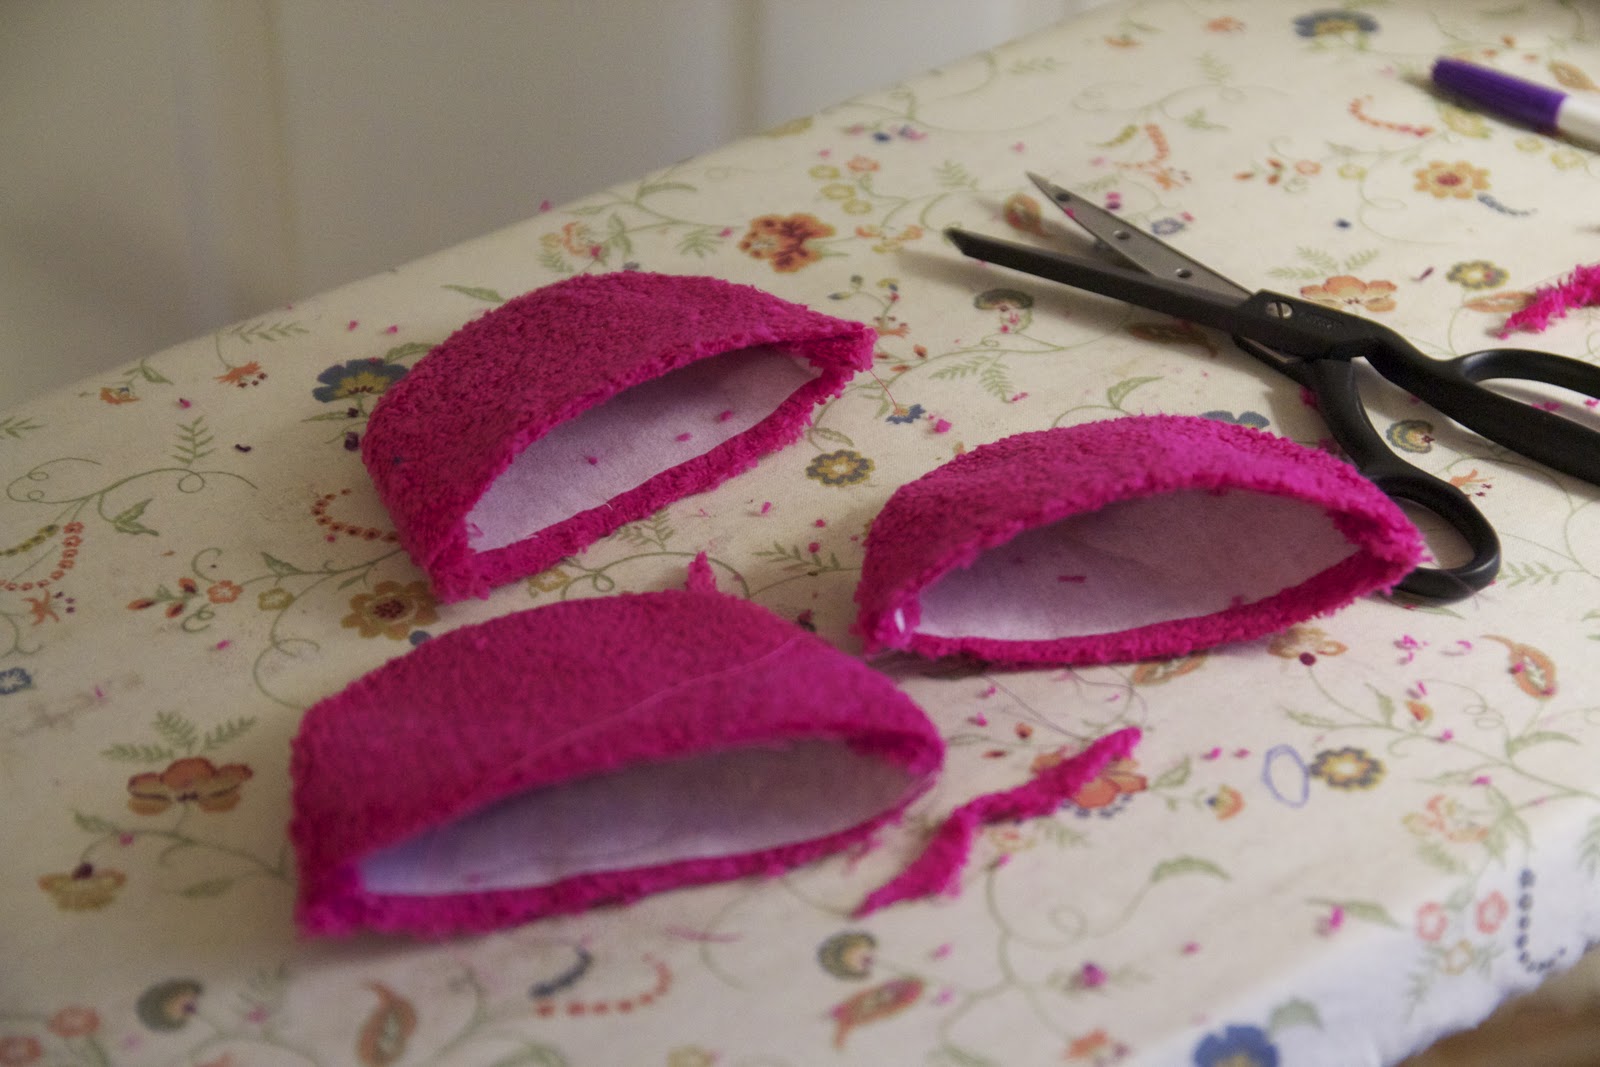
Cut 6 pieces of interfacing. Cut them slightly smaller than your terry cloth. Follow the directions and iron them onto your spikes. 


Then, pair up your spikes and pin them together, right sides facing. (You should be able to see your interfacing.) Sew along the curve with a 1/4" seam allowance, leaving the bottom open. 
Turn right side out and press with your iron.


After your spikes are nice and pressed, sew along the curved edge, giving it a nice finished look.


Now place the spikes onto the right side of one of the hood halves. Match up the raw edges. 


Place the other half of the hood on top, sandwiching the spikes in between both pieces. again matching up all the raw edges. Pin all 3 layers together. 


Sew along the 2 raw edges, making sure to get all three layers. Follow the curve of the spikes...yours should look similar to the picture above. Make sure to back stitch at each end.


Next, cut the corner making sure not to cut where you sewed. I ran an extra zig zag stitch all along the edge to prevent fraying. If you have a serger, you could serge this edge as well. 


Flip it right side out! You now have your hood! Set aside.


Attach hood to the bath towel:
Take your bath towel and fold it in half, matching the shorter edges. Iron on the fold to make a crease. Open the towel and measure 4" on each side of the crease. Mark with a pin or marking pen. 
I don't have a picture of this, but fold each mark towards the crease and pin in place. Sew across making sure you catch all three layers.  You now have a pleat down the center of the towel.


Take your hood and line up the bottom part of the hood with the towel, right sides together. Match the center of the hood (where the spikes are) with the center crease of the towel. Pin in place. Sew all along this edge with a 1/4" seam allowance. 
Take this part slow. Since you are going through so many layers, it is pretty thick, especially when you get close to the spikes. Make sure to back stitch at each end. 


When you are done, this is what your towel should look like. Make sure to remove all your pins!


That's it! Now go give your kids a bath! They will be so excited to use their new Dino Towels!!

My little cutie. Who says dinosaurs are just for boys??

Monday, August 22, 2011

Shop Update: Crayon Rolls

I hope everyone is having a great first day back to school!! I know it's hard for all you mommies of Kindergarteners, but just think about how much fun they are having! I know I'll be a mess when my kids start school. I cried when Bobby started Mother's Day Out last year!

I finally sat down in front of my sewing machine and made a bunch of crayon rolls for the shop! I thought it was fitting for the start of the school year. Stop by and see if anything catches your eye!

One of my favorites for girls!

So fun for a little boy!

I heart skulls!

I just love this print by Ann Kelle. So bright and cheerful!

Thursday, June 16, 2011

Father's Day Basketball

Lately Rob has been saying how he wants to start showing Bobby how to dribble the ball. I thought it would be fun to give him a personalized basketball from Bobby so they could get started!

It turned out so cute!


Concentrating VERY hard...


Messy hands!!

After the handprints dried, I wrote on the ball with a paint pen.

Can't wait to give his surprise to Daddy!

He is so proud!

Happy Father's Day to my hubby, my daddy, step-dad and my father-in-law!

Monday, May 16, 2011

Tutorial: The Anywhere Bag

Summer time is upon us which means lots of traveling for my family. I have a laundry bag I made a couple years ago that always travels with us to hold our dirty clothes. I decided to alter the size to make it smaller and came up with:

The Anywhere Bag!

It's so versatile, you can use it for diapers/wipes, toys (which is what I use it for while we travel), crayons and coloring books...you name it!

I am not sold on the name...what do you think? This is what I've been calling it to myself and it just kinda stuck...

You really can take it anywhere and use it for anything...as an added bonus, it's reversible!

To begin, gather your supplies:

Outer fabric cut: 22.5" x 13"
Lining fabric cut: 22.5 x 13"
Casing piece cut: 4" x 44"
Drawstring cut: 2-21" x 3" pieces
Safety pin, scissors, iron, straight pins, pinking shears (optional)

Casing:

Fold the casing in half, right sides together, short ends together. Sew together using a 1/2" seam, to make a tube. Iron seams open.

Flip tube right side out, center the seam and press tube flat.

Fold in half lengthwise and press. The seam should now be hidden on the inside. Set aside.

Drawstring:

Using a 1/2" seam allowance, sew together the drawstring strips along the short ends (right sides together) to make one long strip.

Iron the long strip in half lengthwise (wrong sides together). Open strip and fold long edges to the center crease and press. Now refold in half and press again.

Top stitch about 1/8" from outer edge. (Not shown in picture) Use your pinking shears to cut each end to help prevent fraying. Set aside.

Bag:

Place the casing piece on top of the main panel (right side facing up) matching the raw edges. Make sure to center the casing so that there is about 1/2" of the main panel showing on each side.
Now place the lining panel directly on top, right side down. Line it up with the main panel. Sew a 1/2" seam across all 3 pieces.

Press everything nice and flat.

Now open the bag so both the main panel and lining panel are laying flat and facing up. Re-fold in half lengthwise, matching up the lining to lining, and main panel to main panel (right sides together). I don't have a picture of this step, sorry! If you skip down 2 pictures, this may help you visualize what I am talking about.

Pin the bag around all the sides. On the lining piece, measure about 4" at the bottom. Mark with your marking pen. This will be the hole left open for turning the bag right side out. Sew 1/4" around the entire bag, except the part for turning. Make sure you don't sew anymore than 1/4". This is very important!

Your bag should now look like this. Clip corners and flip right side out. Use a pencil or turning tool to push the corners out.

Bag flipped right side out. (I haven't poked out the corners yet)

Fold in the opened edges you left open for turning. Pin and either hand sew or edge stitch the opening shut. Push the lining down into the main panel.

Using your iron, press around the casing to help the lining lay nicely. Almost done!

This step is optional, but I ran a stitch around the top edge of the bag, for a more polished look.

Using your safety pin, run the drawstring through the casing, making sure not to pull all the way through.
Center the drawstring so there is an equal amount on each end.

Find the center of the casing (it should be at the fold) and sew a few stitches to tack the drawstring in place, so it doesn't come out.

Tie a knot at the end of each drawstring.

That's it!

Now stuff it full of goodies!

Main panel is by Ann Kelle, lining fabric is Riley Blake.

**Like I said earlier, this can be made in any size you want! It works great as a laundry bag, too!
Related Posts Plugin for WordPress, Blogger...